Single Price Change
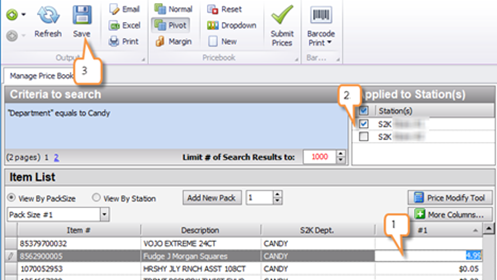
Now that you have made your search, you may need to change prices on items. Locate the items in your search that need a price change.

1. Click in the box to highlight the current price or the empty space if no price was there. Now change the price and select enter on the keyboard. You will then need to go to the Save button to prompt a send to the register.
2. Make sure that you are changing the price for the correct station, if you have multiples you are in charge of.
3. Once done, please select Save to get the prompt to send it to the register.
When the Prompt pops up, you will want to select Update only CHANGED items to POS. This is because you only changed a few items and not all items in the list. Then select OK.
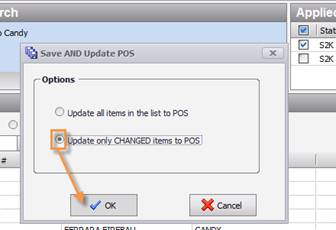
Once you select OK on the Save and Update to POS screen, you have one more screen that pops up to send them to the POS.
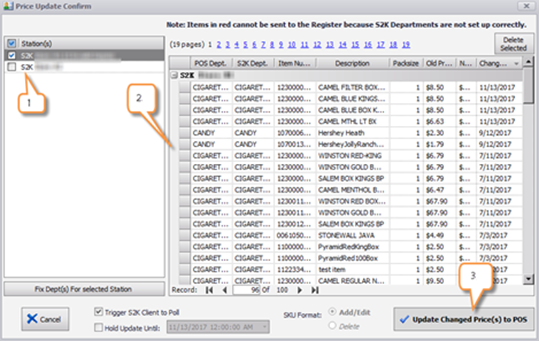
1. Make sure your correct station number is selected
2. Check to see if your price changes you made are listed in the group
3. When ready, select the Update Changed Price(s) to POS button. This will now start the process of sending these updates to the POS. You may need to give it a few minutes before you go check the item at the register.
Multiple Item Price Changes
Multiple item price changes are done when you want them all to change to the same price, go up or down in price by a specific dollar amount or by a percentage. You will want to start by completing your search in the pricebook.
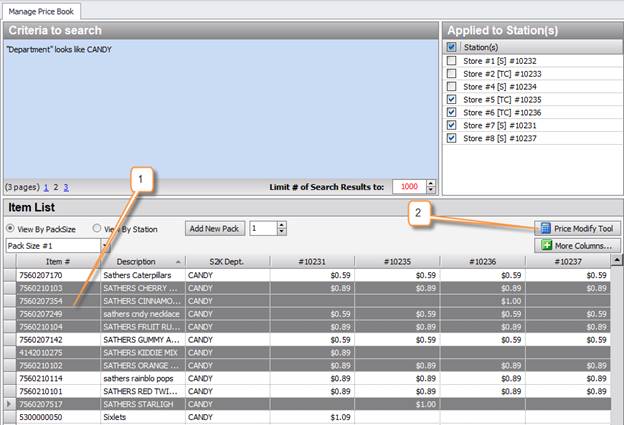
1. Select your items by pressing and holding CTRL on your keyboard while also clicking the items
2. Once you selected all items, click the Price Modify Tool to start the multiple item price change
Now you are ready to make the price changes for multiple items at one time.
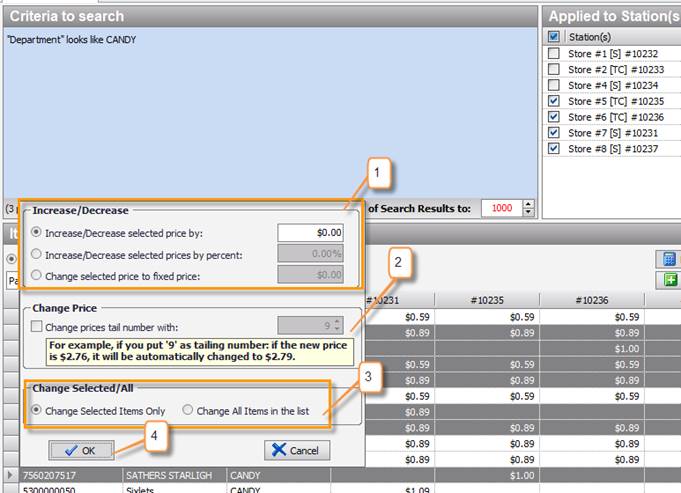
1. This section lets you choose how you will change the prices.
a. You can choose to increase or decrease by a dollar amount.
b. You can also change the prices so the all become the same price, this is the Change Selected Price to a Fixed Price.
c. The middle option is Increase/Decrease the selected prices by a percentage. If you choose this option please see item number 2 below.
2. This will be used ONLY if you use the percentage option. This makes it so that the price change you make using a percentage can get a correct ending number on it such as the retail favorite of prices ending in the number 9.
3. Now that you have selected the type of price change you want to make, you are going to tell the system if this change is for items you have selected OR if you didn’t select anything and want the changes to take place on all items in the listing.
4. Once you have chosen the correct change type, you will select OK to complete the change process, but you are not officially done yet.
Next, you need to Save and send to the register.
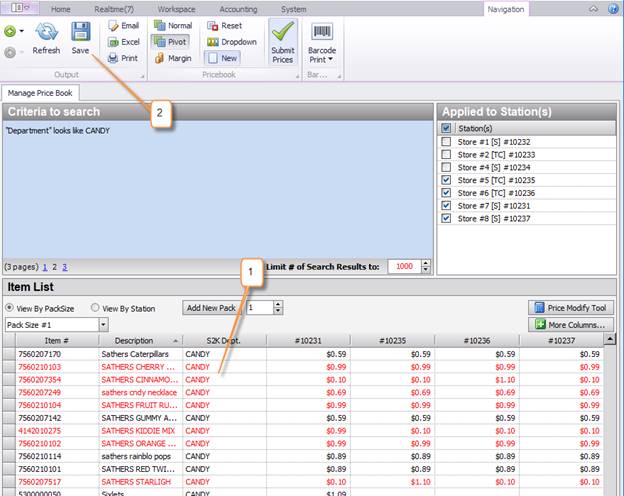
1. Your changes are in a red color and ready to save
2. Select the Save button to complete the price change
Hitting Save then opens a pop up screen for you to verify your save and update options.
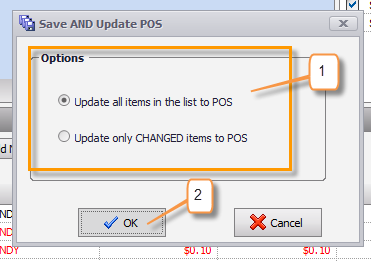
1. This portion is VERY important. You need to tell S2K how you want to send the items to the POS. Choose the best option for the price changes you just made
2. Select OK once you are ready to move forward
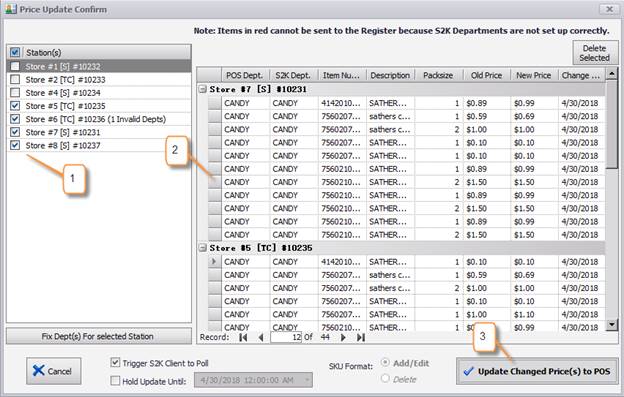
1. Make sure your correct station number is selected
2. Check to see if your price changes you made are listed in the group
3. When ready, select the Update Changed Price(s) to POS button. This will now start the process of sending these updates to the POS. You may need to give it a few minutes before you go check the item at the register.