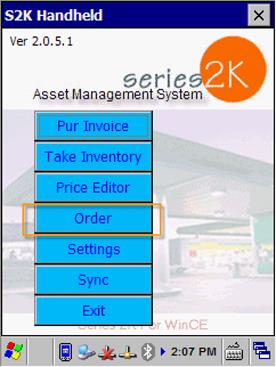
To order products from a supplier using the handheld scanner, open the s2k application and select Order.

This will bring you to a screen that shows all of the existing orders on the device, or it will be blank if there are none created yet. You will also have 3 options to choose from below. New, Edit, or Delete (pictured below).

1. To create a new order- Tap the new button. An invoice header screen will appear (pictured below).
2. To edit an existing order- Highlight the invoice by tapping on it one time, then tap the edit button.
3. To delete an order- Highlight it, then tap delete.

1. Verify that the date is correct.
2. Enter the order number.
3. Tap the vendor button and select the *previously setup* vendor.
4. Enter the order dollar amount.
5. (Optional) Select the *previously setup* employee who is making the order.
6. (Optional) Enter the name of who will deliver the items.
7. Enter the check number if the payment term is by check.
8. Select the method of payment for this order.
9. Field is currently inactive.
10. Tap view details button to begin scanning items.
*Contact S2k support for setup information.


After scanning the item and seeing the information populate, adjust the quantity field by using the keypad on the device.
Verify that the cost and retail are correct for each item.
When you finish the first item, you can immediately scan the next one. If you scan the same item more than one time, a prompt will appear on the screen to manually add a bulk quantity. (Pictured below)
Enter the bulk quantity amount in the Add Qty field, then press the Done button on the screen or the enter key twice on the keypad to dismiss the prompt and return to the item scan list.


As shown in the screen below, the order shows you the UPC of each item as well as the quantity, cost, and retail.
The arrow to the left of the UPC will show the selected item's description and department in the bottom section.


When you finish scanning all of the items for the invoice, click the X in the top right corner to close the invoice. It will save automatically.
Now you should see the invoice listed on the screen from before (pictured below).
You can edit or delete the invoices here using the buttons at the bottom.

Tap the X in the top right corner to close and return to the main screen.
To bring the invoice into S2k, click the Sync button.

Then click the Download data from handheld button.
