A store waste invoice is created in S2K when product is broken or expired and inventory for the item needs to be reduced
Click the non-fuel invoices option and select the link for Create New Invoice:

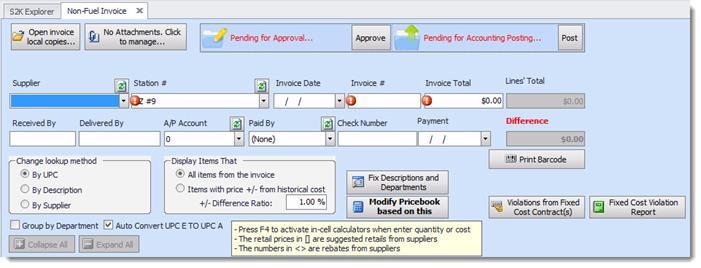
The invoice window will open.

Invoice Header Information
To enter a new invoice tab through the following fields:
(** All fields with exclamation mark ( ) are REQUIRED**)
1. Supplier
2. Station ID
3. Invoice Date
4. Invoice #
The vendor name for store waste invoices is Inventory Adjustment. Please select Inventory Adjustment as the supplier name from the dropdown:

Next, select the store and invoice date

Then enter the invoice number using the following format: Waste & date.
For this example, we will use Waste 7/1/2014

Since this is an internal invoice, please leave the invoice total $0 for now.

Once the line items have been entered, the invoice total can be updated to match the line total.
NOTE: The remaining header fields are optional, as this is a store waste invoice
Invoice Line Item Information
The next step is to enter the UPC numbers that are included in the waste product
Click in the sku field and enter the first UPC number.

Click in the Quantity field and enter a NEGATIVE amount for how many of the items were wasted. By entering a negative quantity, the system will reduce the overall stock value.

Tab to the next field called Cost. The last cost for the item will populate. If this is the correct cost, then leave the amount as is. If it needs to be updated, then click in the cost field and update the amount here.

Tab through the cost field and the extended cost will update to a negative value. When a negative quantity amount is multiplied against a positive cost, then it results in a negative extended cost, which is correct.
**Only make the quantity negative and leave cost and retail a positive amount. The system can then calculate the reduction correctly.

The next field displays base cost or average cost for the item, followed by retail and extended retail. Again, the extended retail is correctly displayed as a negative figure, because we want to reduce the overall retail total for the item.

Finally, the profit percentage is displayed which is calculated based on the cost and retail for this item. If the profit percentage isn't accurate, then be sure to check the cost and retail figures to make sure those amounts are correct.

Tab through the line to add the next item. Continue this process until all UPC's have been entered.

When finished, update the invoice total field to match the line total. The difference field on the invoice should be $0.

Then, click the approve button to save and approve the invoice

Click YES to confirm.

Once saved, the inventory will be reduced for those items based on the date of the store waste invoice.
Close the tab to complete.
