A TPR is a temporary price reduction. There is a start date and end date and price that needs to be entered. TPRs are simply retail price changes that are sent to the POS on the day they start and then S2k will send the old price back on the day it ends.
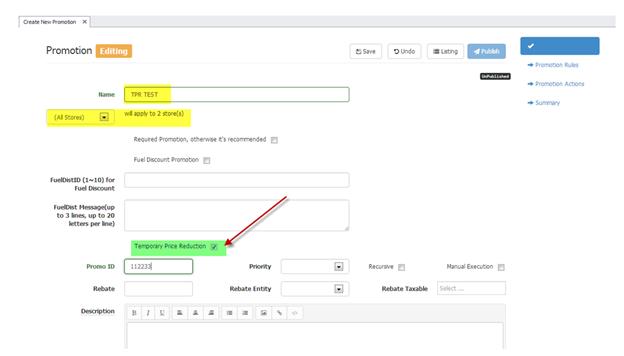
1. To create a TPR the first step is to enter all of the basic info on the TPR Promotion that you want to setup, at the minimum the name of the TPR and the stores you want to apply the TPR to.
Then to flag as a TPR and not a regular promo, you much checkmark the box next to Temporary Price Reduction.
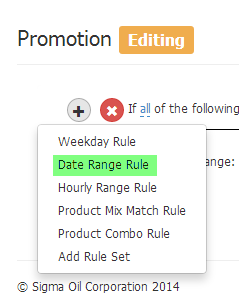
2. The second step is to setup the Promotion rules for the TPR…choose Promotion Rules on the right, then enter the date range for the TPR. THIS IS REQUIRED. Click the + sign and choose “Date Range Rule”
Date Range Rule: This
is to choose a start and end date of the promo. Click the Calendar symbol  to choose a DATE and the clock symbol
 to edit the time, otherwise the
time will default to 00:00:00 on the start date and 23:59:59 on the end
date.
to edit the time, otherwise the
time will default to 00:00:00 on the start date and 23:59:59 on the end
date.
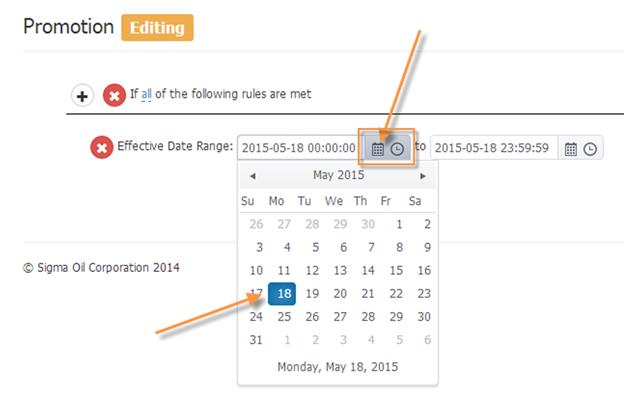
You will then see the date range you chose to review. If you need to edit either one, simply click on the date and edit.
NOTE: AS DEFAULT: the start date will send the TPR price at the beginning of the day chosen at 00:00:00 and will send the OLD price back at the end of the day chosen at 23:59:59 you can edit as needed by clicking the clock icon.
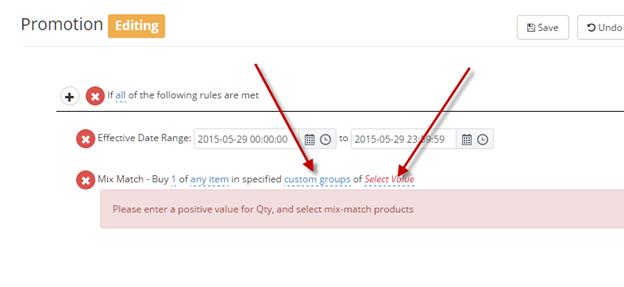
3. The next step is to click the + symbol again and choose “Product Mix Match Rule” this is the ONLY one you should use for setting up a TPR.
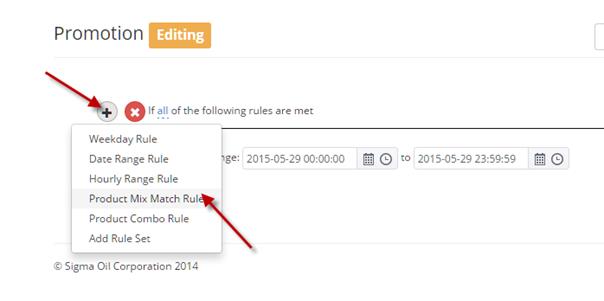
Then enter the items or groups of items you want to set a retail for. ONLY edit the custom groups and Select Value fields shown below:
For custom groups you can choose from a custom group to identify the items you want to have in this TPR OR you can change the custom group default to product by clicking on custom groups and changing to products and clicking the blue arrow to save selection.

Then the Select Value field will be used to choose your custom groups to apply or to choose the products you want to use in this TPR.
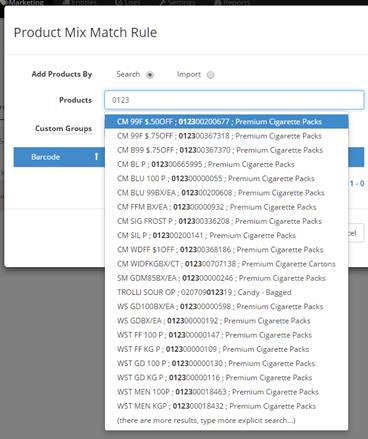
For Products click in the products lookup field and start entering the SKU you want to use, when you find it in the list, click on it and it will add to the list below. Repeat until all the SKUs are in the list you want to apply the TPR to.
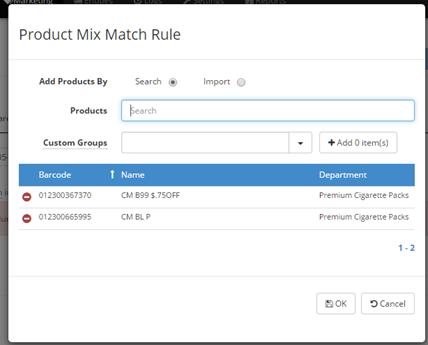
OR you can choose from the Custom Groups box.

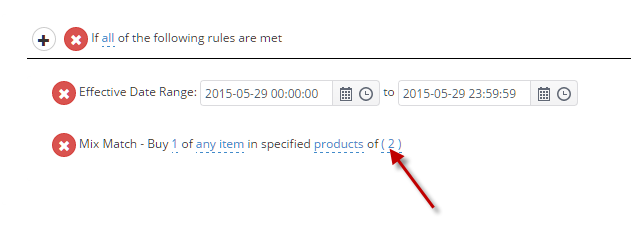
All your groups are in the dropdown, choose the groups you want to apply and click OK when done. You can see the final view below. If you want to see what the items are in the (2) simply click on it and you can edit as needed provided the TPR is not published yet.
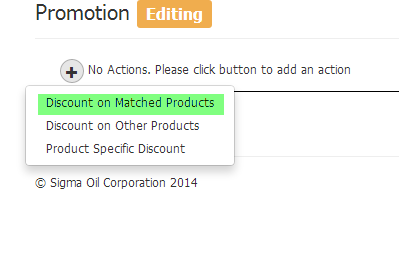
4. The next step is to set the Promotion Action. Which is what is the special price that I want to send these items at? Click on the Promotion Action item on the right side. Click the + sign and choose “Discount on Matched Products” this is the ONLY option you use for TPRs.
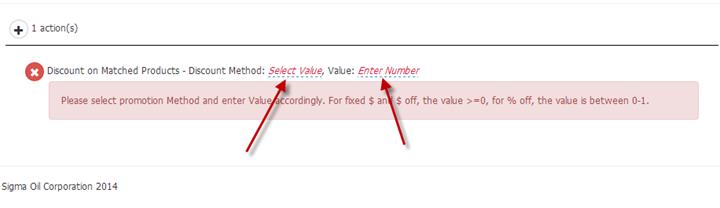
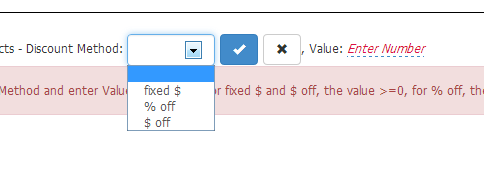
Then you must edit the Select Value to choose the discount method (fixed $, % off, $ off), and then enter the amount to match the discount method. This action will apply to all of the items selected. Again use the blue check mark to make your selections.
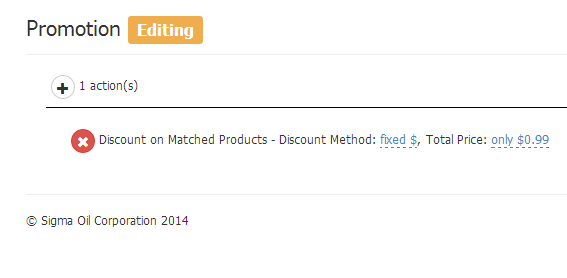
The final selections will display and you can click on them to edit if needed (only if unpublished).
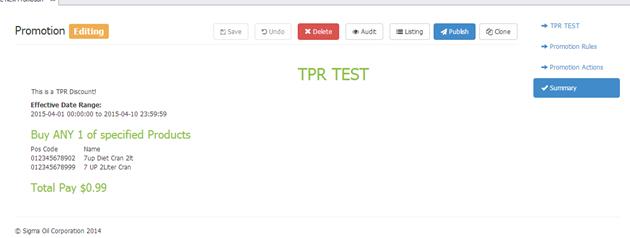
5. Click Summary on the right side to review your TPR and make sure you setup correctly.
6. Then SAVE at the top when done. This will take you back to your main manage promotion listing.
7. To publish the TPR you can click Publish at the top of your screen just like any other promotion, or batch publish when ready from the main listing.
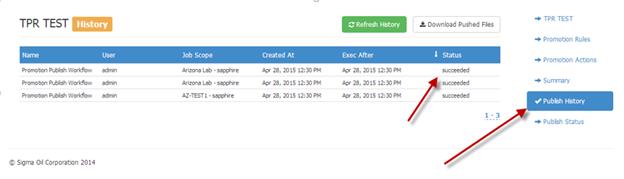
Once you have published your TPR you can view the Publish History to see that it was published and what time and by what user and if successful.
You can also view the status under Publish Status to see which sites accepted or rejected.
