New Jobber Features
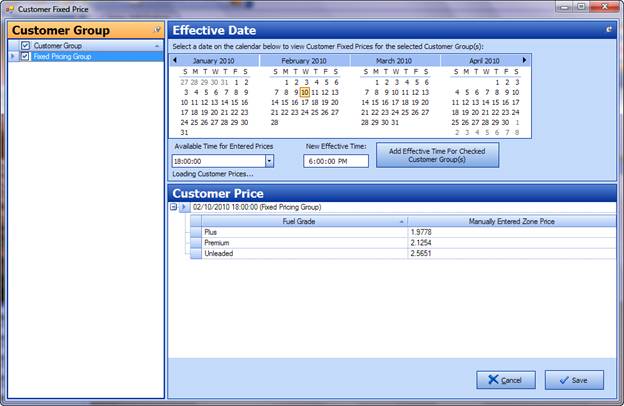
With our new Customer Fixed Price module you can charge your customer a set price no matter where the fuel product is pulled from. No more manual entry or overriding of the existing sale price. Simply key in your daily price to the Customer Fixed Price module and let Series2K do the rest of the work. Manual entry is required for now until we develop a brain probe to retrieve the price.
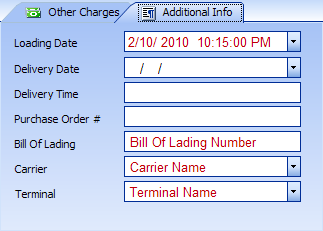
The system will automatically input the specified sale price based on the date and time the fuel product was pulled from the Additional Info tab on the fuel invoice entry. Data gathered from the supplier import is displayed on the Additional Info tab within the View Existing Fuel Purchase Invoices.
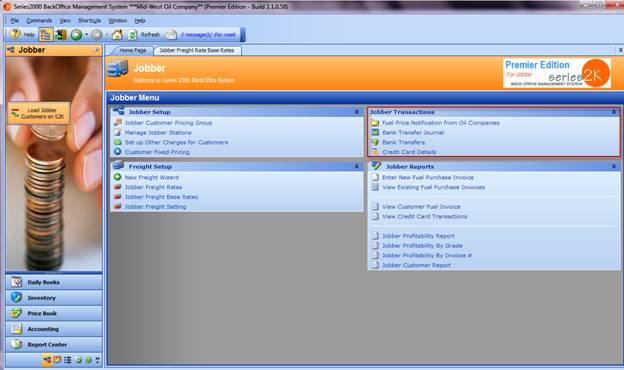
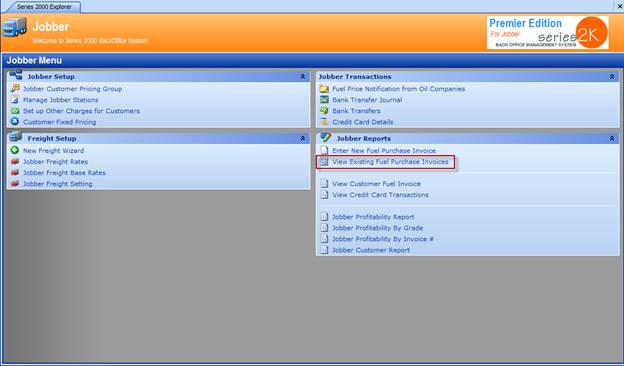
Now the Jobber module has all transactions in one simple location. We have added the Fuel Price Notification from Oil Companies, Bank Transfer Journal and Bank Transfers to the Jobber Transactions Menu giving the user all of their data in a single menu.
Giving the user even more flexibility, we have added an additional feature to the Commands menu for Splash Blending. Many of you purchase two products from the supplier but deliver only one combined or splash blending product to your customers. This added funtionality will allow you to do just that.
Select the View Existing Fuel Purchase Invoices from the Jobber menu.
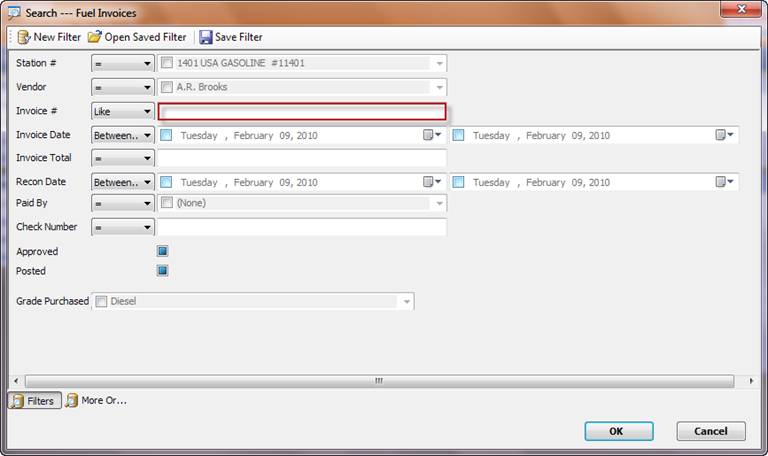
Enter either the BOL number or the invoice number to retrieve the invoice that will be splash blended.
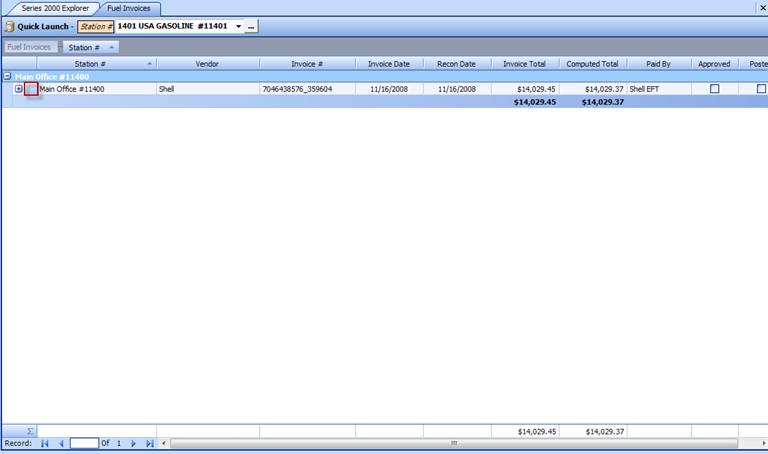
Select the invoice for edit by highlighting the row of the invoice.
Select the Edit option from the toolbar menu.
Select the dropdown arrow of the Commands option on the toolbar menu.
Select the Splash blend for selected invoices option from the Commands dropdown menu.
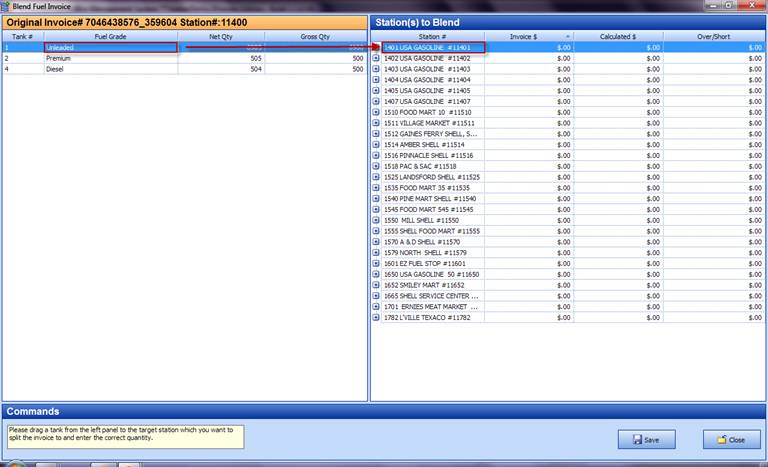
Select the first product to splash blend and while holding down your right mouse button drag to the specific location of the blended product.
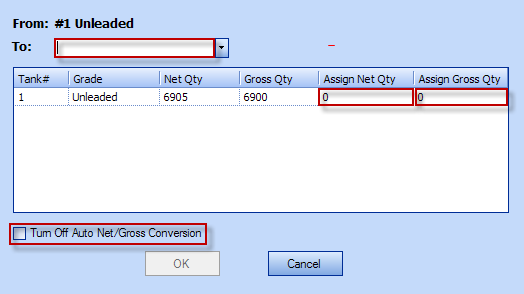
From the dropdown menu option in the To: section, select the product as a result of the blend. This will normally be Midgrade or Plus.
Next input either the Net or Gross gallons of the blended product delivered. The system will automatically calculate gallons that werenít input.
If you want the option of inputting your own Net / Gross gallons select the option Turn Off Auto Net/Gross Conversion. With this selected the system will not calculate the gallons but will require input of both Net and Gross before the OK option will become active.
Once you have completed all blends, select the Save
option.
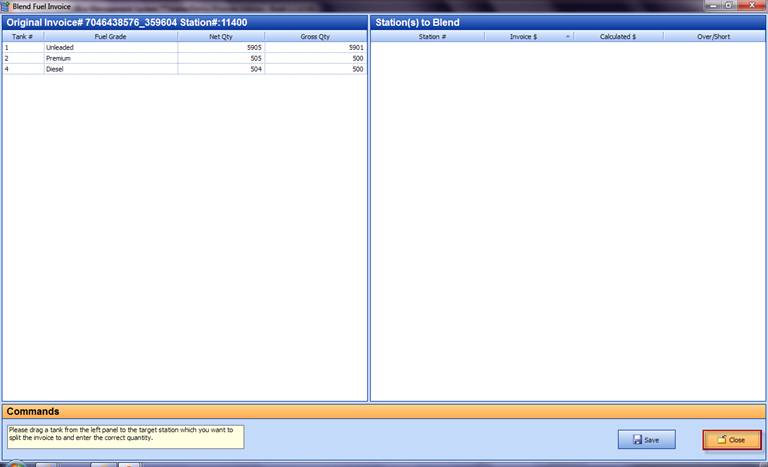
Once the save is completed the Station(s) to Blend will become blank and the Close option will be highlighted. Select Close to exit the blend menu.
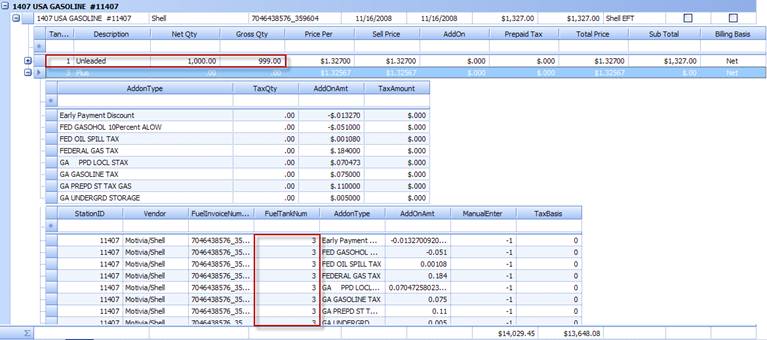
By expanding the invoice you can see the blend results.
The original product is now on the invoice for the product that was blended however the blended product has now been assigned to the specific destination.
Once the data is confirmed you will need to approve the invoice for posting.
Highlight the row(s) of the invoice(s) to be approved. To select more than one row use the Shift and left mouse click to select a group of invoices or the Ctrl and left mouse click to select random invoices that arenít together.
Select the dropdown arrow of the Commands option on the toolbar menu.
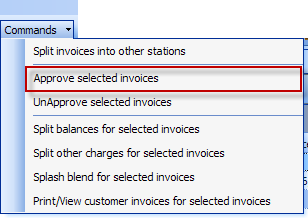
Select the Approve selected invoices from the dropdown menu option.
