Supplier
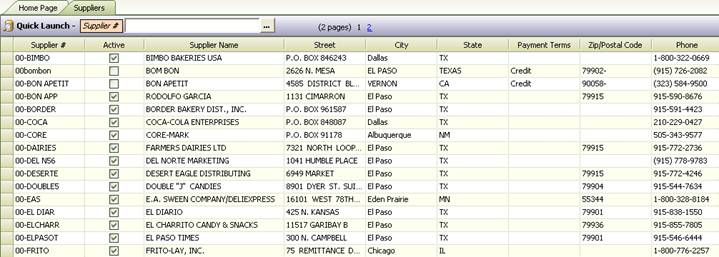
Here you can view/edit your suppliers/vendors. This includes supplier number, name, type, payment terms, address, phone numbers and email addresses. You can also set the vendor as active or uncheck the active box to make them inactive.
To add a supplier, click on the edit button ( ) and enter in the supplier information into the
new line that appears. (seen below).
) and enter in the supplier information into the
new line that appears. (seen below).

5. Under supplier # and supplier name, just enter the name of the supplier.
6. Make sure the active box is checked.
7. Select if this vendor is a fuel or non-fuel from the drop down menu that will appear when you click in the “Type of Vendor” field. You only have to do this for a fuel vendor. Otherwise, you can leave this as default.
8. If you have payment terms entered, select payment term from dropdown menu. (to add new payment terms, please see section on adding payment terms)
9. Leave the “Default Payable” and “Default Account” alone.
10. Tab through and enter in any other information you would like such as address and phone number etc. These are optional fields for your reference only.
Once you have entered in the entire supplier’s information,
be sure to click on the save button ( ).
).
To edit a supplier, go to “Supplier” under the Switchboard
Menu (this can also be accessed through the Daily Books menu under Customers and
Suppliers). The list of your suppliers will come up (as seen below). Simply
click on the edit button () and click into
the field you wish to edit, make your changes and click the SAVE button
when finished. You can also double click on the vendor name to display the
details screen.
Refresh Dropdown Menu
Because data in Series2k is web-based, if you add a new
vendor or supplier and want to use them immediately, it will be necessary to
refresh the download menus since the data you have is web based. To do this
simply click on the “Refresh Download” button ( ) at the top of the screen. This will
automatically update the system.
) at the top of the screen. This will
automatically update the system.