Inventory Search
From the Inventory Menu, select Inventory Manager. Search inventory history using search criteria such as department, item #, station # etc. Click where indicated below to begin search.

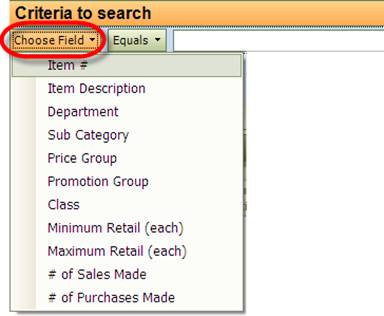
You can search by selecting from the list of fields in the drop down menu shown below.
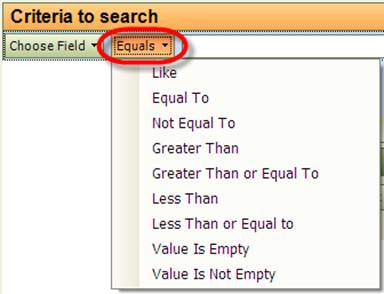
You can also search using the “Equals” drop down menu which will give you more options to specify your search criteria further. Using ‘Like’ for example, can help you to bring up items when you don’t know their exact description or SKU number. You can just enter the first few letters or numbers to bring up all items that begin with what you enter.
Below, Department has been chosen as the field to perform the search in. Now, using the dropdown menu as shown, you can choose which department you would like to search in.
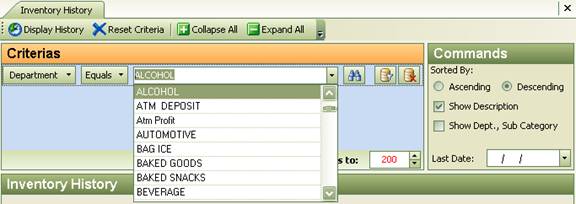
Once you have made your selection, click on the find
button . This search button will show all
items in the Alcohol Department.
To clear and start a new search, simply hit the  button.
Below is a search performed for an item description that is like ‘Marl’. It brought up the list below.
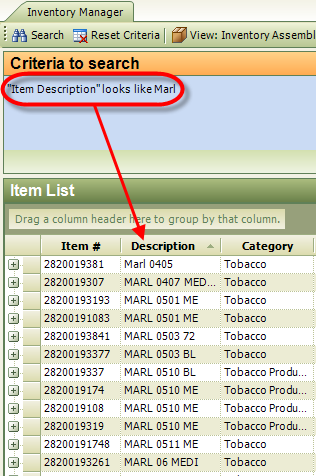
We suggest playing around with the search feature to get an idea of what you can do. It’s a very powerful tool. You can print your results from any search simply by hitting the print key.
Search Using Multiple Criteria
You can customize your inventory search to get any specific results you need by entering in multiple criteria.
For example, if you want to find all items in a certain department, purchased from a specific vendor, see the instructions below. Search for the department, then click on the ‘Add a child criteria’ button. This will bring up another area for you to enter another search.

Select Vendor from the dropdown menu, then the vendor as shown below.
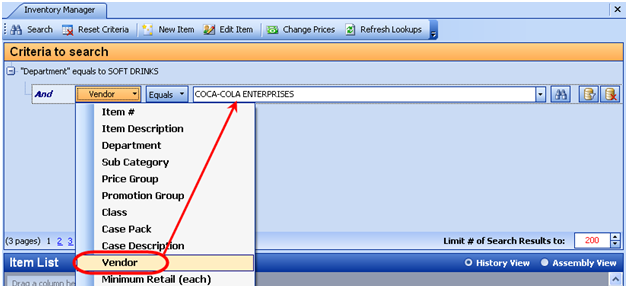
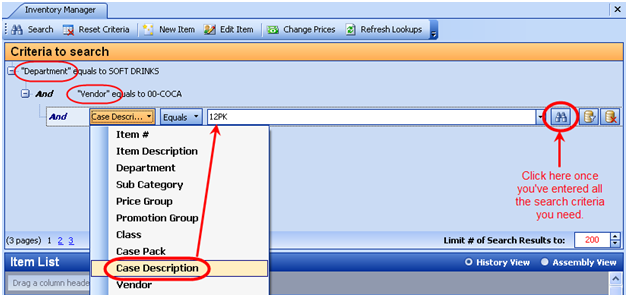
You can then add a 3rd search criteria. In the example below, the search includes items in the soft drink department purchased from Coca-Cola that are 12 packs. There are hundreds of different ways you can customize searches so just test it out to get familiar with how it works.
Add New Item
In the Inventory Menu, go to Add New Item.
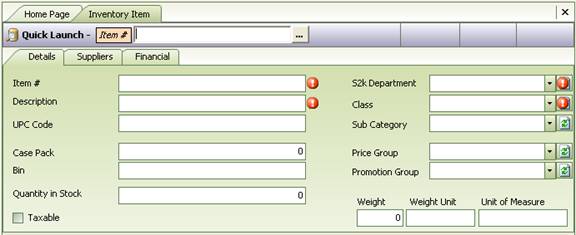
Enter the item #, Description, S2k Department (from drop down
menu). The other fields are optional. When you have entered in all the
information, click on the save button ( ).
Class will automatically be filled in depending on the department you choose.
If you would like to enter more items, just click on the
‘create new’ button ( ) and follow the steps
above.