Add New Item
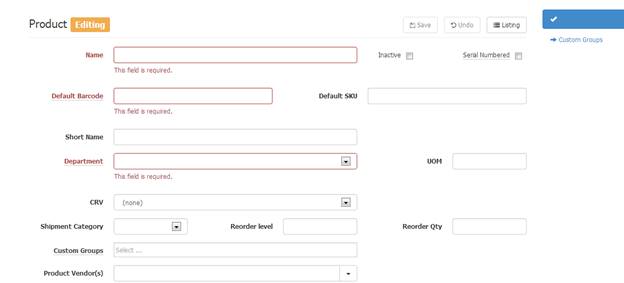
Referring back to the Main Product Manager – Product List window. To add a new item click the +New button at the top of the screen. A Product Editing window will appear (pictured below), use this screen to add a new item to the product list. Enter all criteria and click Save.
BARCODE RULES: for Default Barcode: Enter all the digits on a barcode label including the leading 0 and check digit, the max number of digits is 14. By entering a length of 6, 7, or 8 digits S2K will automatically convert to UPCA. Any barcode shorter than 6 digits will be left alone and items will be packed with leading 0s as needed automatically when the POS receives it. Any UPC will be validated with the check digit. If it does not exist or is not correct, we will append or fix the check digit automatically.
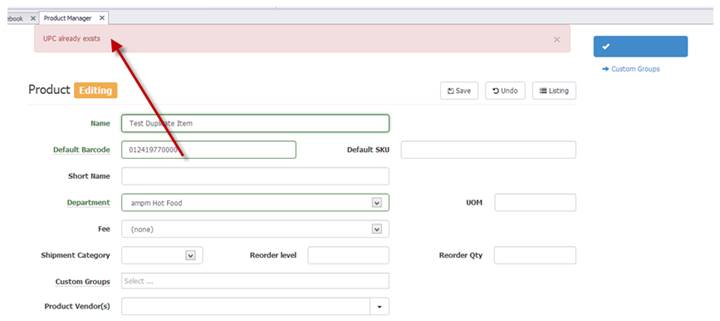
If item already exists after you click save, an error will appear and not save the item:
To flag item to a vendor click the “Product Vendor” field and start typing the vendor or choose from dropdown:

You can also use the BATCH EDIT option from the main screen to apply a group of items to a vendor.
NOTE: When an invoice is entered, items are automatically allocated to the vendor.
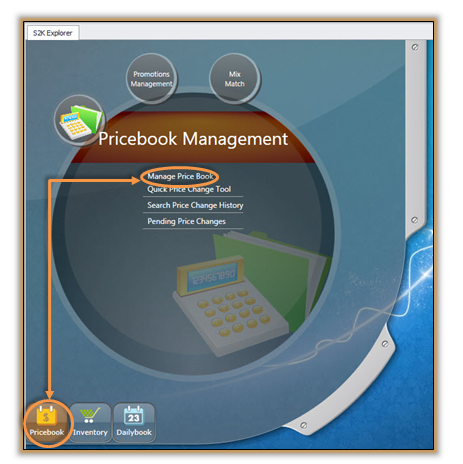
To update the retail and publish the item to the POS, go back to the S2K home screen and click the Pricebook button (pictured below) to open the Pricebook Management bubble, then select the Manage Price Book link.
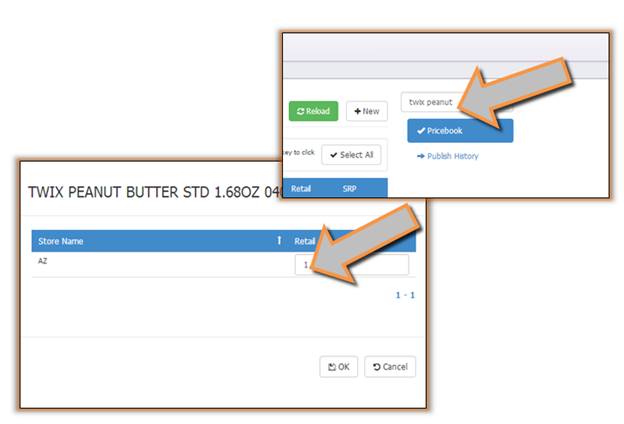
Search for the item using the search fields available (pictured below).
Click once on the item to open the details window (pictured below). Update the retail and click OK.
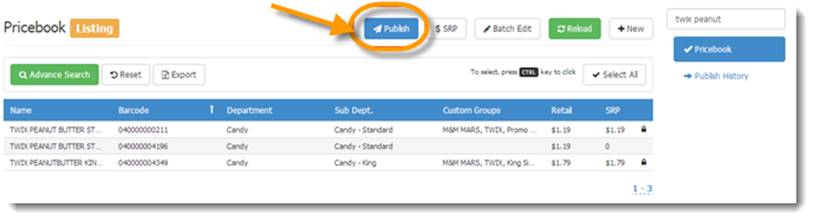
To publish an item from the main screen, just choose the items and click PUBLISH (pictured below), this will send the items to the POS. User can see the result in the PUBLISH HISTORY menu.