How to Select which Take Inventory Option
The difference in which inventory you can take is as follows:
Just The Items Taken
Just the items taken means that S2k will ONLY review and correct the actual items taken and give you a revised difference for those items.
Complete Departments for Items Taken
This option allows you to let S2k review each department selected and zero out any items in each department taken when the calculation is done.
Complete Inventory All The Store
This option is selected when you are doing a complete inventory and this will reset ALL items and ALL departments to the actual quantity taken from your handheld data.
From the Take Inventory menu review the main header menu as shown below:

And from here if the circled window is blank as above image, then the calculation will ONLY consider the actual items taken. In the below examples you can see other options:

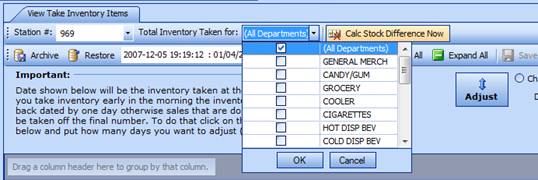
This option above will take all items as a Total Inventory for ALL Departments and below is only specific departments. Also note that the displayed departments are only shown for actual departments where items were actually scanned in. If a department has no items in the Take Inventory then that department does not show in the above option:

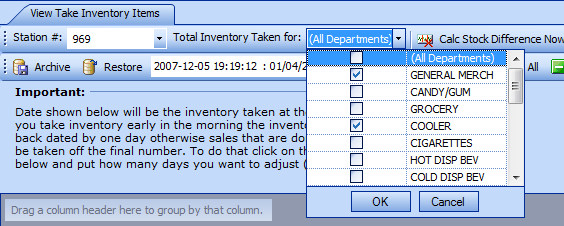
In the above selection S2k will presume ONLY General Merch and Cooler were complete inventories and the rest just for the items taken. NOTE: You must deselect the select tick for (All Departments) if you only want specific departments.